
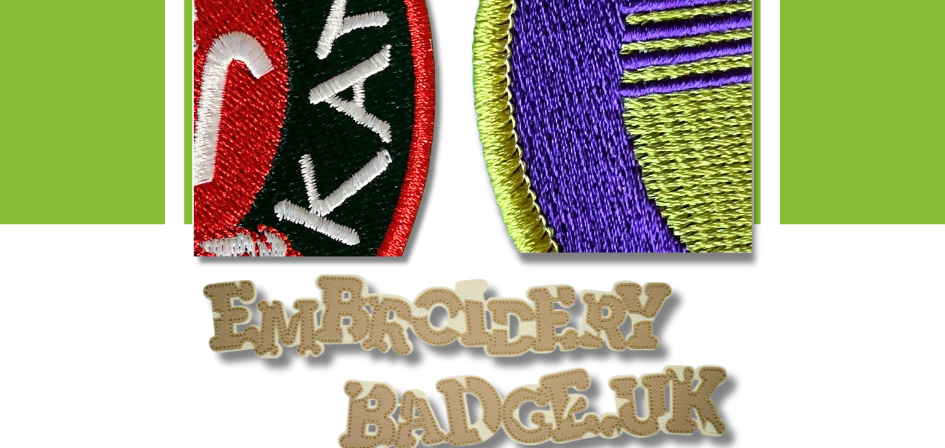
When crafting stunning badges, the border is more than just a finish — it’s the frame that defines your badge’s quality.
In 2026, customers notice the edge instantly. A great design can look “cheap” if the border is bulky, uneven, or not suited to the badge shape. At EmbroideryBadge.uk, we’ve produced tens of millions of badges over the last 30+ years, and we’ve seen the same issue repeatedly: the wrong border choice ruins an otherwise perfect patch.
When you request your free mockup, our team will recommend one of three primary border types based on your artwork, size, shape, and application method (sew-on, heat seal, Velcro, etc.). Here’s the honest truth about each option — including what most suppliers won’t tell you.
Quick answer: the 3 main badge border types
- Merrow (Overlocked) Border — the classic thick “wrap-around” edge for simple shapes.
- Embroidered Satin Stitch Border — the modern premium edge for clean finishes and complex shapes.
- Laser-Cut (Borderless) — the minimalist option when the design works best without a stitched edge.
1) Merrow (Overlocked) Borders: The “Old School” Heavyweight
Merrow borders (also called overlocked borders) are named after the American company that popularised the machine used to create them. This is the traditional, thick, “wrap-around” edge you’ll recognise on many military, scout, and retro-style patches.
How it works: A separate overlock machine wraps thread around the badge edge, so the border is visible on both the front and the back.
The look: Classic, chunky, and durable — especially on larger badges.
Advantages of a Merrow Border:
- Fuller edge — covers both sides of the fabric for a bold, traditional finish.
- Great for larger patches — thickness suits 70mm+ patches and simple emblems.
- Hard-wearing — excellent for uniforms and long-life use.
Limitations (read this before choosing Merrow):
- The “nasty bump” warning: Merrow is a manual loop. The operator has to finish the stitch somewhere, creating a visible overlap point (a bulky “bump”) where the stitching starts and ends.
- Not ideal for heat seal: The border is usually applied after the heat-seal glue, so the back of the border may have little to no adhesive — which can reduce reliability when heat-pressing.
- Not suitable for small badges: On small patches, the thick edge can overpower the design and make details feel cramped.
- Limited shapes: Works best on simple outlines (circles, squares, shields). It cannot follow complex or jagged silhouettes cleanly.
2) Embroidered Satin Stitch Borders: The Modern Premium
This is our 2026 standard for high-end streetwear, corporate branding, and clean finishes. A satin border is stitched directly by the embroidery machine as part of the design, giving a smooth, refined edge.
The look: Sleek, precise, and premium. Typically around 1.5mm–2mm wide depending on size and shape.
Advantages of a satin border:
- No bumps — unlike Merrow, the start and stop points are neat and practically invisible, so the edge looks smooth all the way around.
- Perfect for complex shapes — lightning bolts, stars, silhouettes, curved logos, and custom outlines all work beautifully (assuming enough space for the border width).
- Ideal for heat seal — the glue can extend right to the very edge, which helps prevent corners lifting over time.
- Premium finish — gives your badge that “fully considered” look that customers associate with quality.
Trade-off:
- The satin border is mainly a front-facing finish. The back won’t look “wrapped” in the same way a Merrow border does — but the front presentation is cleaner and more modern.
3) Laser-Cut (Borderless): The Minimalist
Sometimes the best border is no border at all. In these cases, we use precision lasers to cut the badge exactly to the edge of the design.
The look: Clean, modern, and integrated — the badge can look like it naturally belongs on the garment.
Best for:
- Appliqué-style badges where a stitched border would feel too bulky or “clunky”.
- Text badges or layered designs where a thick edge would distract from the message.
Warnings to know before choosing borderless:
- For woven badges, we generally recommend a border in most cases. Without a border to “lock” the edge, you can sometimes see slight distortion or fraying over time — especially on thin outer edges.
Which badge border should you choose?
Here’s a quick comparison. If you’re unsure, use this as a guide and we’ll confirm the best option in your free mockup.
| Feature | Merrow Border | Satin Stitch Border | Laser-Cut (Borderless) |
|---|---|---|---|
| Shape flexibility | Simple (circles/rectangles/shields) | Works for complex shapes & curves | Any shape (best when design supports it) |
| Edge finish | Thick & rounded | Smooth & flat | Flush to fabric |
| The “bump” | Yes (manual overlap point) | No (clean finish) | No |
| Best for… | Traditional / retro patches | Premium streetwear, caps, corporate | Modern appliqué & minimalist designs |
The EmbroideryBadge.uk “Design Consult” (Free Mockup)
Still not sure? That’s exactly why we offer a free mockup.
When you submit your design, our team doesn’t just copy-paste. We look at your logo and tell you things like:
- “A Merrow border will be too bulky at this size — go satin for a cleaner finish.”
- “Your outline is complex — satin stitch will follow it properly.”
- “This is a perfect candidate for laser cutting, but we’ll reinforce the edge to keep it stable.”
With 30+ years in the game, we help you avoid the nasty bump, avoid peeling corners, and end up with a badge finish that looks premium and lasts.
