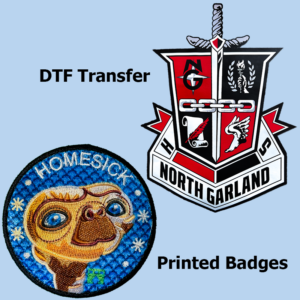
dtf transfer, custom dtf transfers, stitch effect transfers, dtf transfers – stitch effect transfer printed on a school hoodie, demonstrating application by Embroidery Badge UK

How to Apply DTF and Stitch Effect Transfers

How to Apply DTF and Stitch Effect Transfers

DTF (Direct to Film) transfers have become increasingly popular due to their versatility and ability to produce vibrant, high-quality prints on a wide range of fabrics. Alongside custom DTF transfers, Stitch Effect transfers offer the appearance of detailed embroidery without the need for stitching. In this guide, we walk through the step-by-step process for applying both types of transfers to achieve consistent, professional results.

Step-by-Step DTF Transfer Application Instructions

Step 1: Pre-Heat the Press

Start by setting your heat press to the correct temperature. For most fabrics, this will be 155°C. If you are pressing onto polyester, lower the temperature to 120°C to avoid heat damage. Once the press reaches temperature, place the garment on the platen and ensure it is lying flat. This helps apply even pressure during pressing.

Step 2: Pre-Press the Fabric

Before applying the transfer, remove moisture from the garment by pressing it for 5 seconds without the transfer in place. This pre-press step improves adhesion by ensuring a dry, smooth surface.

Step 3: Position the DTF Transfer

Place the DTF transfer in the desired position on the garment. Make sure it lies flat with no wrinkles or movement. Accurate positioning is important, as the design will be permanently fixed in this location.

Step 4: First Press

Cover the transfer with protective or release paper supplied with the transfer. Press the garment for 10 seconds using medium to firm pressure. This allows the adhesive to activate and bond to the fabric.

Important Post-Press Steps

Step 5: Peel the Transfer

Custom DTF transfers can be peeled either hot or cold. However, for best results, we recommend a cold peel. Allow the garment to cool completely before peeling the film away. Roll the film off in one smooth, controlled motion to prevent lifting or distortion.

Step 6: Second Press for Durability

After peeling, place the garment back under the heat press. Cover the design again with release paper and press for an additional 5 seconds. This second press helps secure the transfer and improves durability, particularly through repeated washing.

Step 7: Inspect the Final Product

Remove the garment from the press and inspect the transfer. Ensure the design is fully adhered, smooth, and free from lifting or wrinkles. At this stage, the transfer should appear vibrant and securely bonded.

Additional Notes and Best Practices

While the steps above provide a reliable guideline, temperatures and timings may vary depending on the fabric and equipment used. Keep the following points in mind:

  • Perform a test press when using a new fabric or transfer type, especially with heat-sensitive materials such as polyester or performance fabrics.

  • Use medium to firm pressure to ensure proper adhesion. Too little pressure can cause lifting, while excessive pressure may damage the fabric or transfer.

  • Adjust temperatures for polyester, keeping the press at 120°C to avoid scorching or fabric distortion.


Stitch Effect Transfers: A Unique Embellishment Solution

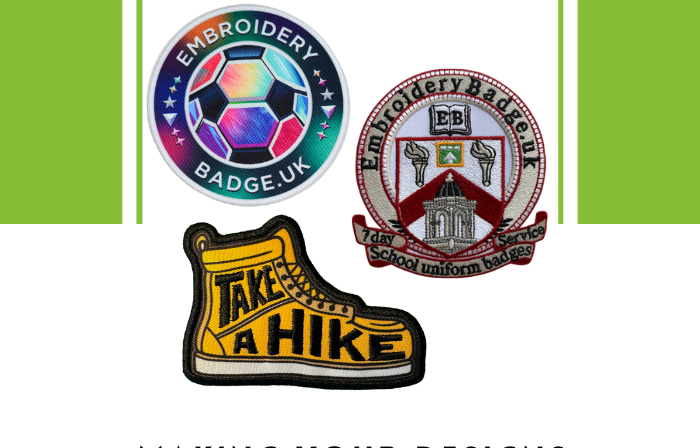
Stitch Effect transfers offer the look of embroidery without the time or cost associated with traditional stitching. They are particularly popular for school bags, uniforms, and workwear where an embroidered appearance is desired.

The application process for Stitch Effect transfers is the same as for DTF transfers. The same temperatures, pressures, and peeling instructions apply, so you can follow the steps above for both transfer types.


Why Choose DTF and Stitch Effect Transfers?

DTF and Stitch Effect transfers offer several advantages:

  • Vibrant colours with high-definition detail across a wide range of fabrics

  • Versatility, allowing application on cotton, polyester, and blended materials

  • Durability when applied correctly, with resistance to fading and cracking

  • Embroidered appearance with Stitch Effect transfers, without the higher costs or production time of traditional embroidery
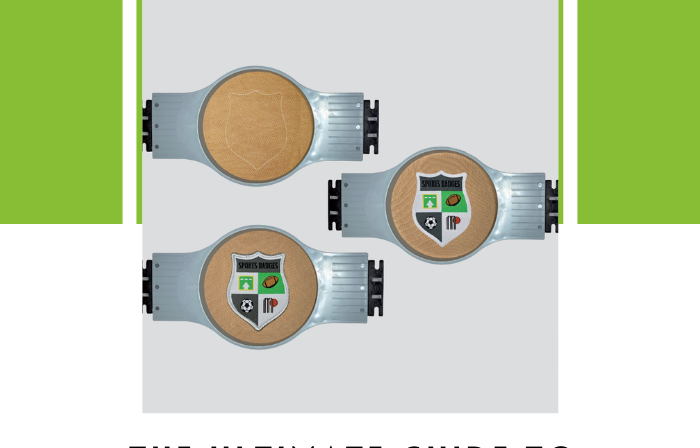
embroidery patches appliqué, applique, school uniforms, school – promotional header illustrating woven badges and appliqué patches for school uniforms by Embroidery Badge UK

The Ultimate Guide to Appliqué Patches for School Uniforms

Appliqué Patches for School Uniforms: Production-First Guidance by EmbroideryBadge.UK

 
Appliqué patches for school uniforms are not just a design choice. In real manufacturing, they are a functional upgrade: faster throughput, cleaner internal comfort, and more repeatable results across bulk batches. Therefore, uniform suppliers can meet back-to-school volume without turning every garment into a stitch-heavy job.

At a Glance

  1. Why appliqué over direct embroidery? Better comfort, faster production, tighter inventory control, and simpler logo updates when branding changes.
  2. Optimising designs: Patch-ready artwork must avoid floating text and fragile “islands”. We contain details inside a stable shape for durability and repeatability.
  3. Application process: Placement stitch files + trial patches + video guidance deliver consistent alignment and a retail-quality finish.
  4. Workflow efficiency: Fewer thread changes, less downtime, and scalable output on multi-head machines.
 
Factor Direct Embroidery Appliqué Patches for School Uniforms
Comfort inside garment Can leave dense stitching and knots against the fabric Typically smoother backing and a cleaner internal feel
Production speed Stitches the full logo into every garment (slower at scale) Apply a finished patch; faster throughput on bulk runs
Inventory & updates Brand changes can force rework or garment write-offs Patch updates extend garment life and reduce waste
Repeatability Outcome varies with fabric batches, hooping, and stitch density Patch is controlled first; garment becomes the carrier for consistency

Introduction

Appliqué patches are one of the most reliable ways to customise school uniforms when you need consistent placement, predictable lead times, and repeatable results across hundreds or thousands of garments. At EmbroideryBadge.UK, we work from a manufacturing perspective. After processing 1M+ designs and producing patches at scale, we’ve learned what fails in production (and why) — including unstable floating details, inconsistent placement, and edge finishes that don’t hold up to wear and laundering. Consequently, this guide focuses on practical decisions that protect quality and repeatability.

Advantages of Appliqué Patches Over Direct Embroidery

Appliqué patches offer production benefits that become more valuable as volume increases:
  1. Superior comfort: A controlled backing reduces irritation caused by rough knots and dense stitch build-up that direct embroidery can leave inside a garment.
  2. Production speed: Applying a pre-made patch is faster than stitching a complex crest from scratch on every blazer. Therefore, it’s ideal for back-to-school demand.
  3. Cost & inventory control: You can stock patches independently of garments. As a result, you reduce the risk of holding pre-embroidered stock that might not sell.
  4. Sustainability: When branding changes, patches can be updated or replaced, extending textile life and reducing waste.
If you want a fast visual overview of the workflow benefits, the video below shows how the appliqué process reduces machine time and simplifies bulk production.
 

Making Designs Compatible for Appliqué Patches

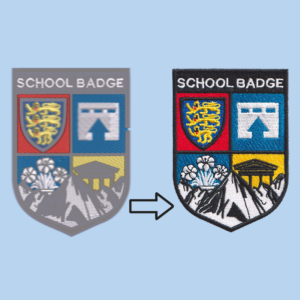
Not every logo is immediately patch-ready. In real production, “floating text”, thin disconnected elements, and tiny islands can shift, distort, or stitch inconsistently across batches. However, the fix is straightforward: you must give the design a stable structure that holds every element together.
  1. Adapting designs for appliqué
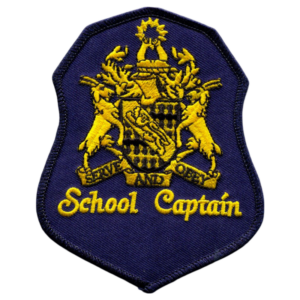
  2. At EmbroideryBadge.UK, we typically incorporate floating elements into a solid background shape (shield, circle, square, or a controlled border system). This containment improves durability, makes trimming predictable, and increases repeatability across bulk runs.
  3. Expert guidance available
  4. If your crest has fragile details, we’ll advise adjustments that keep the branding recognisable while making the patch manufacturable. In production, the target is not “perfect once” — it’s consistent every time.

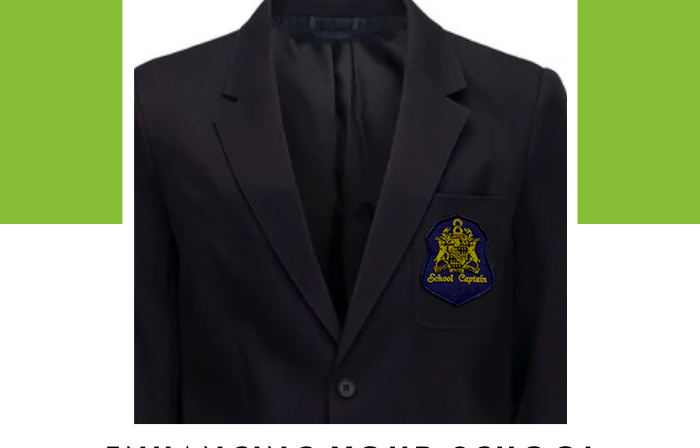
School captain appliqué patch for school uniform blazer with contained text and defined patch boundary

Proper Application of Appliqué Patches

To achieve a professional finish, appliqué is a process — not a guess. When you standardise placement and edge stitching, you reduce rejects and maintain consistent presentation across sizes and garment batches.

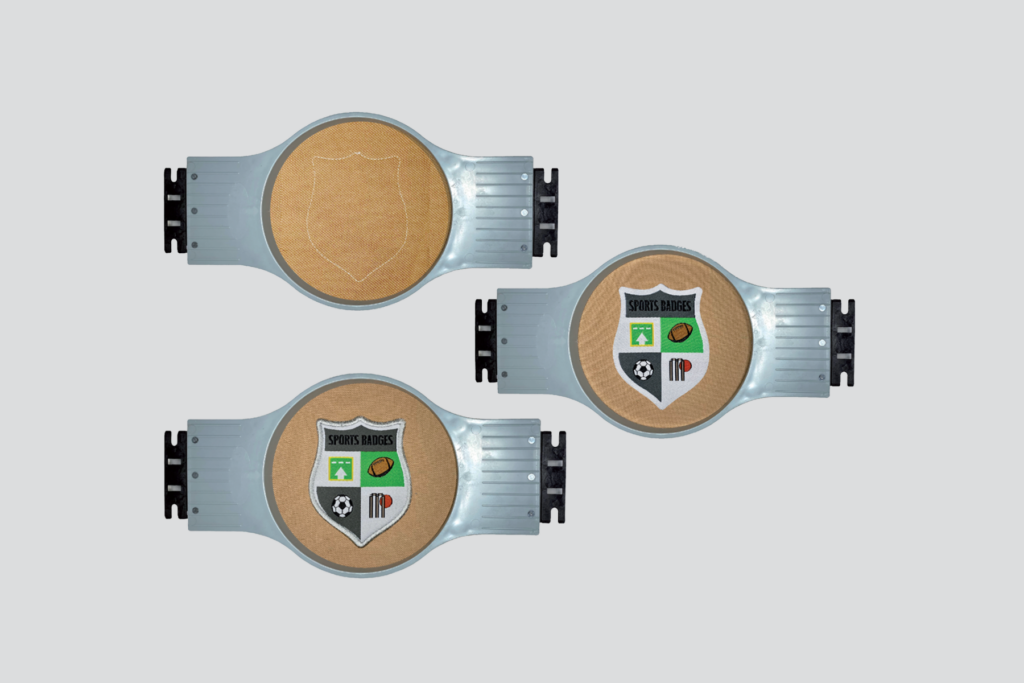
Precision placement with stitch files

  • We supply stitch files that create an outline on the uniform. This outline acts as a placement guide, so the patch aligns consistently. As a result, you reduce skew, keep crest height consistent, and improve repeatability.

Trial patches for practice

  • EmbroideryBadge.UK offers trial appliqué patches and stitch files so your team can validate the technique on the actual fabric. After a few runs, the workflow becomes fast, consistent, and scalable.

Video tutorials and expert support

  • We provide video demonstrations and production support to help operators master the “place-and-stitch” workflow. If something looks off on the first test, we’ll help diagnose the cause—placement, stitch path, fabric behaviour, or edge control—so the method stays repeatable.

Appliqué patch application on school uniform: placement outline and edge stitch for repeatable finish

Optimised Workflow and Production with Appliqué Patches

For uniform suppliers, the appliqué method simplifies the shop floor because small time savings multiply at scale.
  • Single thread usage (often): Many appliqué applications rely mainly on the border/edge stitch colour. Consequently, you reduce thread changes and downtime from breaks or colour swaps.
  • Scalability: Appliqué is optimised for multi-head machines, enabling consistent output across dozens of garments per cycle during peak season.

Test and perfect the appliqué technique

To help you get started, EmbroideryBadge.UK offers trial patches and stitch files so you can confirm the workflow on your real garments and hooping setup. In addition, we help you lock down a repeatable standard so every batch matches the last.

Conclusion

Switching to appliqué patches for school uniforms delivers practical benefits that matter in production:
  • Enhanced comfort: Cleaner internal feel and reduced irritation for students.
  • Increased efficiency: Faster throughput and fewer thread changes during high-volume runs.
  • Sustainability: Replace crests without scrapping garments, which reduces waste and extends uniform life.
Ready to standardise your school uniform patch workflow? EmbroideryBadge.UK is here to help you implement appliqué with a production-first approach. We provide:
  • Stitch files: Placement outlines and edge control for consistent alignment.
  • Trial patches: Samples to validate the appliqué technique before bulk runs.
  • Expert advice: Practical support focused on durability, tolerances, and repeatability.
Contact EmbroideryBadge.UK today
sportswear, embroidered, printed patches, patch and for – graphic for blog article 'Making Your Designs Compatible for Patches' illustrating guidelines to make your designs compatible with embroidered or printed patches by Embroidery Badge UK

Making Your Designs Compatible for Embroidered or Printed Patches

How to Make Your Designs Compatible for Embroidered or Printed Patches: A Guide by EmbroideryBadge.UK

Learn the best techniques for converting your designs into patch-ready formats, ensuring a perfect fit every time.

Introduction

Designing patches for uniforms, sportswear, or merchandise involves more than just creating a logo; it’s about ensuring the design fits within a compatible shape and structure. At EmbroideryBadge.UK, we have a wealth of experience, with over 1 million designs under our belt, and our expert designers can guide you through the process of making your designs patch-ready. In this blog, we’ll explore different ways to adapt designs for patches, whether they are embroidered badges, printed patches, or silicon transfers.

1. Basic Shapes for Patch Compatibility

One of the simplest ways to make a design patch-compatible is to fit it into a basic shape. Here’s how:
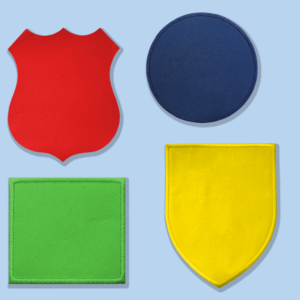
  • Choose a Standard Shape: Basic shapes like circles, squares, rectangles, shields, and ovals are the most common formats for patches. Review your design and see if it can fit directly into one of these shapes.
  • Adjusting Text Layout: If your design includes text that doesn’t fit the chosen shape, you might need to adjust the layout. Our designers can help reposition text or elements so that everything fits neatly within the shape while maintaining the integrity of the design. For embroidered & printed patches, we also suggest having a square shape to fit all the minor details and still look neat!


2. Contour Following for Unique Designs

For designs that don’t fit into basic shapes, contour following is a great option:
  • Adapting to Your Design’s Shape: We follow the contours of your existing design to create a patch that matches its outline. This technique ensures that the patch shape complements the design, giving it a custom and professional look.
  • Incorporating Text and Elements: When following the contours, we make sure to arrange text and other elements in a way that integrates them seamlessly with the design. This approach maintains the aesthetics while ensuring that the patch remains cohesive and functional.

3. Expert Design Assistance

At EmbroideryBadge.UK, our designers have extensive experience in adapting and converting designs for patches. If you have a challenging design, you can send it to us, and our team will work with you to create a patch-compatible version:
  • Collaborative Process: Let us know what you want to achieve with your design, and we’ll use your guidelines to craft a patch that fits your vision.
  • Approval Process: Once we create the artwork, we submit it for your review and approval. This ensures that you and your customer are satisfied before proceeding with production.

4. Printed Patches and Alternatives: DTF Transfers

If you prefer a flat, printed look instead of an embroidered effect, DTF (Direct-to-Film) transfers are an excellent option:
  • Flat and Thin Finish: DTF transfers offer a smooth, flat appearance that can be applied directly to the garment, providing a modern and sleek look.
  • Stitch Effect Prints: For those who like the appearance of stitching but prefer a printed application, we offer a stitch effect print. In this case, you don’t need to alter your design—simply choose the transfer style, and it’s ready for application.

5. Raised Silicon Transfers for Sportswear

For sportswear or activewear, raised silicon transfers provide a dynamic and tactile option:
  • Durable and Flexible: These transfers are designed for performance garments, providing a flexible and durable solution.
  • Limited Colors: Silicon transfers are typically available in 3 to 5 colors, giving you the freedom to experiment with different combinations. However, color options are limited compared to embroidered or printed patches.
  • Custom Shapes: Silicon transfers can be cut to any shape, as long as the smallest section of the design is at least 1-1.2mm wide. This ensures durability and prevents the transfer from tearing or distorting.
For examples and samples of our raised silicon transfers, check out our silicon transfer gallery to see the possibilities for your sportswear designs.


Conclusion

Making your designs compatible for patches involves thoughtful planning and adaptation. At EmbroideryBadge.UK, we offer a range of solutions tailored to your needs:
  • Basic Shapes: Fit your design into standard shapes for quick and easy patch adaptation.
  • Contour Following: Customize the patch shape to match the contours of your design for a unique look.
  • DTF and Silicon Transfers: Explore flat and raised options for sportswear and garments requiring a specific texture or finish.
Whether you need an embroidered patch, a DTF transfer, or a raised silicon option, our team is here to help you every step of the way. Send us your design, and we’ll transform it into a patch-ready format, ensuring it meets your requirements and the customer’s expectations.
Contact EmbroideryBadge.UK Today
Let’s work together to create designs that not only look great but are also optimized for patch production!
school uniform, school uniform blazer, embroidery patches – promotional header showcasing woven badges and appliqué patches for school uniforms from Embroidery Badge UK

Enhancing Your School Uniform Blazers

Enhance Your School Uniform Blazers with Embroidery Patches from EmbroideryBadge.UK

Discover the benefits of using high-quality embroidery patches for school uniform blazers and how EmbroideryBadge.UK can help you streamline your uniform customisation process.
 

Introduction

School uniform blazers are more than just a piece of clothing; they symbolize unity, pride, and a sense of belonging among students. Traditionally, these blazers are either embellished at the source and imported or sent to local embroiderers for customization. However, this method often presents challenges such as inventory management issues, increased costs, and time constraints—especially during the busy school season.

At EmbroideryBadge.UK, we offer a sustainable and efficient solution: heat-sealed embroidery patches for school uniform blazers. In this blog, we’ll explore the advantages of this approach and how it can revolutionise your uniform customisation process.
 

Challenges with Traditional Blazer Embellishment

1. Uncertain Demand
Predicting the exact number of students who will purchase blazers each year is challenging. To avoid running out of stock, companies often overstock embellished blazers, which leads to excess inventory if the demand doesn’t meet expectations.
2. Overstock Issues
For suppliers working with multiple schools, unsold blazers with specific school logos accumulate over time. This excess stock not only ties up capital but also occupies valuable storage space.
3. Inefficient Customization
Sending blazers to local embroiderers can be time-consuming and may not be cost-effective, especially for small orders. This issue is amplified during the busy school season, where the window for customization is tiny, and everyone is pressed for time. Delays can result in dissatisfied customers and lost sales.
A person overwhelmed by the excess stock of school blazers, there are many school blazers for school embroidery
 

The Heat-Sealed Embroidery Patch Solution

EmbroideryBadge.UK provides heat-sealed embroidery patches as a flexible and efficient alternative to traditional embellishment methods.
Advantages:

On-Demand Customisation

  • Stock Blank Blazers: Keep an inventory of plain blazers and a variety of school logo patches.
  • Immediate Application: When a student purchases a blazer, the appropriate patch is applied on the spot using a heat press.

Time Efficiency

  • Quick Application: Applying a heat-sealed patch takes about 30 seconds, allowing the blazer to be ready in under a minute.
  • Meet High Demand: Easily handle peak seasons without overwhelming your staff or delaying orders.

Improved Inventory Management

  • Reduce Overstock: Minimize excess inventory by stocking blank blazers instead of multiple embellished versions.
  • Cost Savings: Free up capital and storage space tied up in unsold stock.

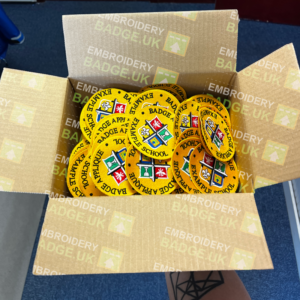
reduce overstock of school badges by ordering appliqué school badges from embroidery badge uk a hand holding a box of school embroidered badges which can be easily appliquéd on to school blazers

Proper Application of Heat-Sealed Patches

To achieve the best results and avoid damaging the blazers, proper application of the heat-sealed embroidery patches is crucial.
Tips from EmbroideryBadge.UK:

Avoid Shiny Burn Marks

  • Issue: Standard swing heat presses apply heat from the top, which can cause shiny marks on the blazer fabric.
  • Solution: Use a heat press that heats from the bottom to prevent direct contact with the top fabric.

Use Smaller Platens

  • Recommendation: Opt for a heat press with a smaller platen size (4×4 or 5×5 inches). This focuses the heat application, ensuring precision and reducing the risk of affecting surrounding fabric.

Expert Guidance

  • Support: EmbroideryBadge.UK offers guidance and resources, including a video demonstration, to help you master the application process.
Longevity and Durability
  • Minimal Washing: School Uniform Blazers are typically washed less frequently than other garments, so the embroidery patches remain intact for extended periods.
  • High-Quality Adhesion: Our patches are designed for longevity. When properly applied, they adhere strongly to the blazer fabric and withstand regular wear. Our glue is very high-quality, ensuring the patches stay in place over time.


Sustainability Benefits

1. Reduced Waste
  • Eco-Friendly: By customizing blazers on-demand, you avoid overproduction and reduce textile waste from unsold inventory.
  • Resource Conservation: Less waste contributes to environmental conservation efforts.

A happy recycle bin not filled up with school blazers

2. Easy Updates
  • Adaptable: If a school changes its logo or branding, a new, slightly larger patch can be applied over the old one.
  • Cost-Effective: Extend the life of blazers without the need to purchase new garments.
3. Charitable Opportunities
  • Blazer Donations: Facilitate blazer donations to charities or incoming students.
  • Rebranding: Use the patch replacement method to update donated blazers with the new school’s logo, promoting reuse and supporting families in need.


Practical Implementation

In-Store Customization
  • Setup: Install heat presses at your retail location.
  • Efficiency: Staff can quickly apply the correct patch when a blazer is purchased, enhancing customer satisfaction.
Compact Storage
  • Space-Saving: Embroidery patches take up minimal space and can be stored conveniently.
  • Readiness: Keep patches organized and readily available for immediate application.
Design Considerations
Logo Adaptation
  • Complex Designs: Some school logos may include floating text or intricate details.
  • Solution: Incorporate the design into a solid shape or background for effective patch application.

School captain badge with floating text

Approval Process
  • Collaboration: Work with schools to approve any design adaptations.
  • Highlight Benefits: Emphasize sustainability and efficiency to gain support from educational institutions.

Conclusion

Switching to heat-sealed embroidery patches from EmbroideryBadge.UK for school uniform blazers offers numerous advantages:
  • Efficient Inventory Management
  • Cost Savings
  • Time Efficiency
  • Sustainability
This method simplifies the customisation process, reduces waste, and extends the life of uniforms, making it a smart choice for schools and suppliers alike.
Ready to Transform Your Uniform Customisation Process?
EmbroideryBadge.UK is here to help you make the transition smoothly.
  • Expert Support: Our team provides guidance on equipment and techniques.
  • High-Quality Patches: We produce durable, vibrant embroidery patches that meet your school’s branding requirements.
  • Additional Resources: For a visual demonstration, watch our application process video.
Contact EmbroideryBadge.UK Today
Let us assist you in enhancing your school uniform blazers with our top-quality embroidery patches.
EmbroideryBadge.UK – Your trusted partner for high-quality school uniform embellishments and embroidery patches in the UK.
A header or featured image of our special stitch patch special stitch patches patches for sewing satin stitch ptches

Choosing the Right Border for your Special Stitch Patch!

Special Stitch Patch Borders: Satin Stitch vs Laser Cut

In badge design, the border does more than finish the edge. It defines the final look and helps the patch keep its shape over time.
As a result, border choice directly affects durability, clarity, and long-term wear.

Our special stitch patches offer several border options. These range from the clean precision of laser-cut edges to the timeless appeal of a satin stitch border.
Therefore, each option suits different applications and design styles.

Whether you need patches for sewing on or prefer a heat-seal option, the right border matters.
In short, we help you choose a border that looks right and performs well in real use.

Exploring Special Stitch Patch Borders: Where Tradition Meets Innovation

A border is not just decorative. It helps the patch sit flat, prevents fraying, and creates a clear outline.
Because of this, the border plays a key role in both appearance and longevity.

If you are choosing between stitched and borderless options, the best choice depends on application.
For example, some garments benefit from a defined edge, while others suit a cleaner finish.

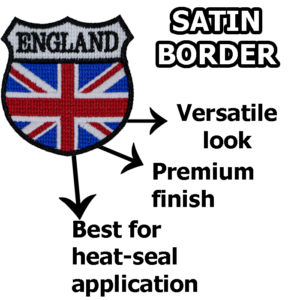
Satin Stitch Border: A Premium, Classic Finish

A satin stitch border remains one of the most popular choices for special stitch patches.
It creates a smooth, raised edge that frames the design clearly and adds a premium feel.

This border also strengthens the edge of the patch.
As a result, it holds its shape well over time and resists wear.

Best for: most shapes and logos, patches needing a polished finish, and designs where the border should stand out neatly.

Special stitch patch with satin stitch border example

Laser-Cut / No Border: Clean Edges, Modern Look

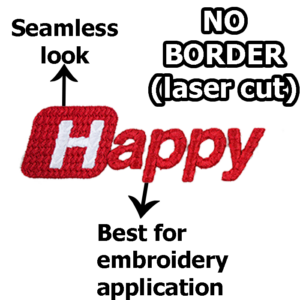
Laser-cut borders deliver a sharp, modern edge.
They work especially well when you want crisp contours without visible stitching.

In many appliqué-style uses, a stitched border is unnecessary.
For example, patches stitched onto garments or embroidered onto felt often benefit from a borderless finish.

Best for: modern shapes, appliqué applications, felt bases, and designs that need a minimal “no-border” look.

Special stitch patch with laser-cut edge / no border example

Ready-to-Appliqué: Seamlessly Integrating Badges

EmbroideryBadge.UK specialises in ready-to-appliqué embroidered badges.
These badges integrate smoothly into garments, accessories, uniforms, and branded items.
As a result, application is faster and more consistent.

Conclusion: Choose a Border That Matches Your Application

Both satin stitch borders and borderless designs offer clear advantages.
However, each option serves a different purpose.

The right border depends on your patch shape, desired finish, and application method.
Therefore, usage should guide the decision, not appearance alone.

If you are unsure, simply tell us how the patch will be used.
We will then recommend the best option for your design.

Place a FREE Quote
View Special Stitch Badges